스프링 시큐리티
스프링 MVC/WebFlux 기반 애플리케이션의 인증과 인가 기능을 지원하는 보안 프레임워크
주로 아래와 같은 기능들을 제공한다.
- 다양한 유형의 사용자 인증 기능 적용 (폼 로그인, 토큰 기반, OAuth2 기반 등의 인증)
- 사용자의 역할에 따른 권한 레벨 적용
- 리소스에 대한 접근 제어
- 민감한 정보의 데이터 암호화
- SSL 적용
- 일반적으로 알려진 공격 차단
- SSO
- 클라이언트 인증서 기반 인증
- 메서드 보안
- 접근 제어 목록
위에 언급한 것 외에도 많은 기능들을 제공한다.
사용해 보기
implementation 'org.springframework.boot:spring-boot-starter-security'gradle 설정에 스프링 시큐리티 의존성을 추가해 준다.
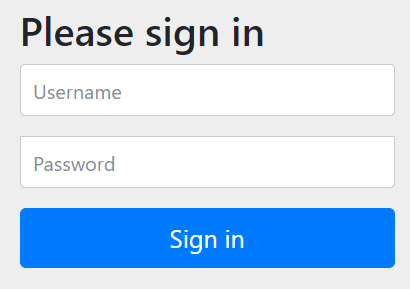
해당 의존성만 추가한 후에 서버를 실행시키면
별도의 설정 없이도 위와 같은 로그인 창이 만들어진다.
2023-07-10 11:29:25.816  WARN 5668 --- [           main] .s.s.UserDetailsServiceAutoConfiguration :

Using generated security password: 32548629-b669-4cb1-af28-6595d2914bfc

This generated password is for development use only. Your security configuration must be updated before running your application in production.
로그인을 위해서는 기본 값으로는
Username에 user를 적고
Password에는 콘솔창에 나오는 비밀번호를 사용하면 된다.
@Configuration
public class SecurityConfiguration {

    @Bean
    public UserDetailsManager userDetailsManager() {
        UserDetails userDetails =
                User.withDefaultPasswordEncoder()
                        .username("da9dac")
                        .password("root")
                        .roles("USER")
                        .build();

        return new InMemoryUserDetailsManager(userDetails);
    }
}
하지만 기본 비밀번호는 서버를 껐다 킬 때마다 바뀌기 때문에
위와 같은 작업을 통해 Username과 Password를 고정시킬 수 있다.
당장은 학습용으로만 사용할 것이기 때문에
InMemoryUserDetailsManager를 사용한다.
@Bean
public SecurityFilterChain filterChain(HttpSecurity httpSecurity) throws Exception {
    httpSecurity
    		// CSRF 공격에 대한 설정 비활성화 (학습을 위해 비활성화)
            .csrf().disable() // 기본값은 enable
            .formLogin() // 인증 방식을 폼 로그인 방식으로 지정
            .loginPage("/auths/login-form") // 로그인 페이지로 사용할 템플릿
            .loginProcessingUrl("/process_login") // 인증 요청을 수행할 요청 URL
            .failureUrl("/auths/login-form?error") // 실패할 경우 사용할 템플릿
            .and()
            .authorizeHttpRequests() // Http 요청이 들어오면 접근 권한을 확인
            .anyRequest().permitAll(); // 클라이언트의 모든 요청에 대한 접근 허용

    return httpSecurity.build();
}
만약 별도의 커스텀 로그인 페이지를 사용하고 싶다면 위와 같은 코드를
SecurityConfiguration 클래스에 추가해 주면 된다.
해당 메서드의 파라미터로 받아오는 HttpSecurity 클래스는
HTTP 요청에 대한 보안 설정을 구성하는 클래스다.
해당 객체를 이용해 자신에게 필요한 보안 옵션을 적용할 수 있다.
@Bean
public SecurityFilterChain filterChain(HttpSecurity httpSecurity) throws Exception {
    httpSecurity
            .csrf().disable()
            .formLogin()
            .loginPage("/auths/login-form")
            .loginProcessingUrl("/process_login")
            .failureUrl("/auths/login-form?error")
            .and()
            .exceptionHandling().accessDeniedPage("/auths/access-denied")
            .and()
            .authorizeHttpRequests(
                    authorize -> authorize
                            .antMatchers("/orders/**").hasRole("ADMIN")
                            .antMatchers("/members/my-page").hasRole("USER")
                            .antMatchers("⁄**").permitAll()
            );

    return httpSecurity.build();
}
위의 코드는 기존의 코드에서 exceptionHandling 메서드를 추가하고
authorizeHttpRequests 메서드의 파라미터 부분만 바꾼 코드이다.
.exceptionHandling().accessDeniedPage("/auths/access-denied")우선 exceptionHandling 메서드는 예외를 처리하는 기능을 하는데
ExceptionHandlingConfigurer를 리턴하고 이를 통해 예외 처리를 할 수 있다.
ExceptionHandlingConfigurer객체의 accessDeniedPage 메서드를 사용해
403 에러가 발생한 경우 지정한 URL로 리다이렉트 되도록 했다.
.authorizeHttpRequests(
        authorizationManagerRequestMatcherRegistry -> authorizationManagerRequestMatcherRegistry
                    .antMatchers("/orders/**").hasRole("ADMIN")
                    .antMatchers("/members/my-page").hasRole("USER")
                    .antMatchers("⁄**").permitAll()
);
authorizeHttpRequests 메서드는 람다식을 사용해 request URI에 접근 권한을 부여할 수 있다.
antMatcher 메서드와 hasRole 메서드를 사용하여 페이지 별로 권한을 정할 수 있는데
antMatcher 메서드의 파라미터에는 어떤 URI를 매치할지 정하고
hasRole 메서드의 파라미터에는 어떤 권한만 허용할지 지정한다.
antMatcher 메서드에서 "/orders/**"와 같은 부분은
orders라는 URL의 하위 모든 URL을 포함하지만
만약 "/orders/*" 라면 orders의 깊이가 1인 URL까지만 포함한다.
.antMatchers("⁄**").permitAll()마지막 부분은 위에서 지정한 모든 URL 이외의 URL의 권한을 정하는 부분으로
이외의 모든 URL은 모두가 접근이 가능하다는 의미다.
antMatchers 메서드의 순서에 따라 우선순위가 적용되기 때문에
구체적인 URL 경로부터 접근 권한을 부여한 후에
마지막 부분처럼 모든 URL을 처리하는 부분은 가장 나중에 적용해야 한다.
@Bean
public SecurityFilterChain filterChain(HttpSecurity http) throws Exception {
    http
        .csrf().disable()
        .formLogin()
        .loginPage("/auths/login-form")
        .loginProcessingUrl("/process_login")
        .failureUrl("/auths/login-form?error")
        .and()
        // 로그아웃 시작
        .logout()
        .logoutUrl("/logout")
        .logoutSuccessUrl("/")
        // 로그아웃 종료
        .and()
        .exceptionHandling().accessDeniedPage("/auths/access-denied")
        .and()
        .authorizeHttpRequests(authorize -> authorize
                .antMatchers("/orders/**").hasRole("ADMIN")
                .antMatchers("/members/my-page").hasRole("USER")
                .antMatchers("⁄**").permitAll()
        );
    return http.build();
}
로그인에 대한 기능을 추가했으면 로그아웃도 필요하다.
위의 코드에서 로그아웃 설정을 위해 logout 메서드를 호출하여 LogoutConfigurer를 리턴하는데
logoutUrl 메서드를 사용해 로그아웃에 사용할 요청 URL을 지정해 주고
logoutSuccessUrl 메서드를 사용해 로그아웃 성공 시 리다이렉트 할 URL을 지정해 준다.
'Back-End > Security' 카테고리의 다른 글
| [스프링 시큐리티] 커스텀 인증 처리 구현 (0) | 2023.07.11 |
|---|---|
| [스프링 시큐리티] 회원가입 구현 (0) | 2023.07.10 |
| Session (0) | 2023.07.07 |
| Cookie (0) | 2023.07.07 |
| Hashing (0) | 2023.07.07 |